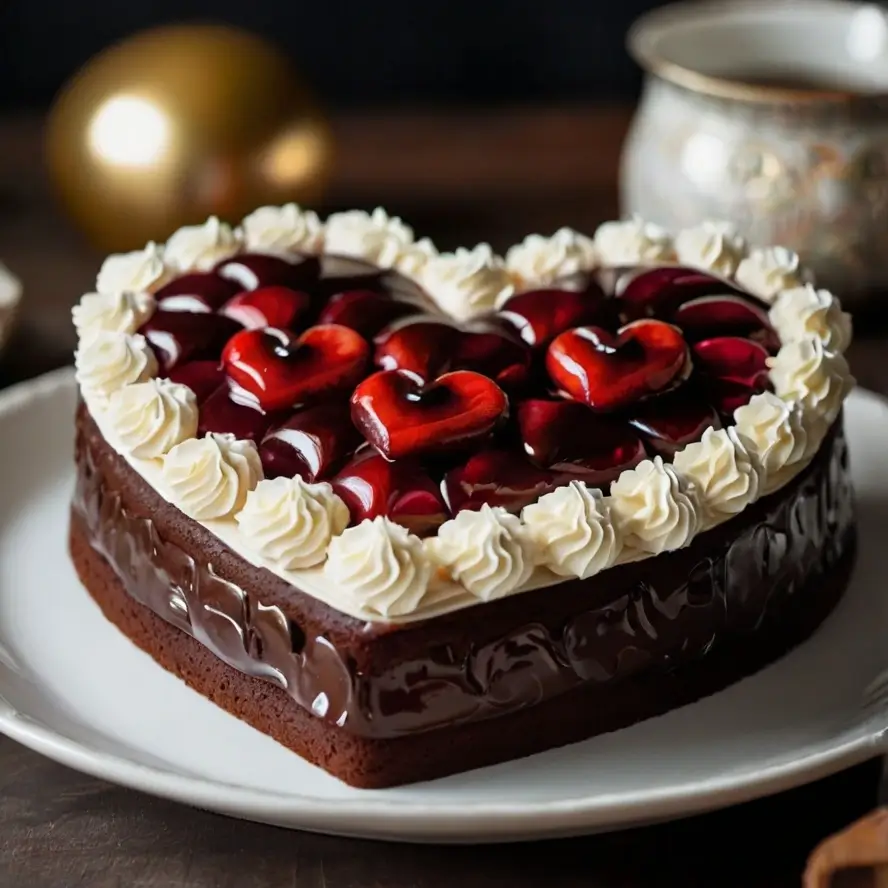
There’s something undeniably charming about a heart-shaped cake. It’s more than just a dessert—it’s a symbol of love, care, and celebration. Whether you’re baking for Valentine’s Day, an anniversary, a birthday, or simply to surprise someone special, a heart-shaped cake is a perfect way to show you care.
This versatile dessert is not only visually stunning but also easy to customize with flavors, colors, and decorations to suit any occasion. With the right tools, ingredients, and a little creativity, you can transform a simple cake into a centerpiece that wows your guests and warms their hearts.
In this guide, I’ll walk you through everything you need to know to create the perfect heart-shaped cake. From selecting the best tools to step-by-step baking instructions and creative decorating ideas, you’ll have all the tips and inspiration needed to make a cake that’s both beautiful and delicious.
Let’s dive in and start baking your masterpiece!
Essential Tools and Ingredients for a Heart-Shaped Cake
When preparing a heart-shaped cake, having the right tools and ingredients is crucial. To explore more about baking essentials, visit this comprehensive baking tools guide. It provides insights into must-have equipment like heart-shaped pans, spatulas, and mixers to make your cake-making experience flawless.

To create the perfect heart-shaped cake, having the right tools can make all the difference. These tools not only simplify the baking and decorating process but also ensure a professional-looking and delicious result. Here’s a breakdown of the essential tools you’ll need:
Tools You’ll Need
1. Heart-Shaped Cake Pan
A heart-shaped cake pan is the foundation of your dessert. This specialty pan helps you achieve the iconic shape effortlessly, saving you the trouble of carving a regular cake into a heart. Look for a non-stick pan for easy release, or line it with parchment paper to prevent sticking. If you don’t have a heart-shaped pan, don’t worry—you can use a round and square pan to create the shape (more on that later!).
2. Spatula (Offset and Regular)
A good spatula is essential for spreading batter evenly in the pan and smoothing frosting over the finished cake. An offset spatula is particularly useful for reaching into corners and edges, ensuring an even layer of frosting. A regular spatula is handy for general mixing and transferring ingredients.
3. Piping Bags and Tips
Piping bags are a must for adding beautiful decorations to your heart-shaped cake. Whether you’re creating intricate rosettes, borders, or writing messages, a set of piping bags and tips will give you creative freedom. For beginners, start with a star tip and a round tip, as they are versatile and easy to use.
4. Stand Mixer or Hand Mixer
A stand mixer is a baker’s best friend, making it easy to whip up cake batter, mix frosting, and achieve perfect consistency. If you don’t have a stand mixer, a hand mixer will work just as well. Either way, these tools save time and effort compared to mixing by hand, especially when preparing large batches.
5. Additional Tools to Consider
- Mixing Bowls: A few bowls in various sizes are helpful for mixing batter, frosting, and other components.
- Measuring Cups and Spoons: Accurate measurements are key to baking success.
- Cake Leveler or Serrated Knife: For leveling the cake layers if needed.
- Turntable: A turntable makes decorating your cake easier by allowing you to rotate it smoothly as you work.
With these tools in hand, you’re ready to tackle your heart-shaped cake project with confidence and ease!
Key Ingredients for Your Heart-Shaped Cake
The magic of a delicious heart-shaped cake lies in using high-quality, fresh ingredients. While the specific recipe you choose may vary, the core ingredients remain the same, forming the foundation of a soft, moist, and flavorful cake. Let’s explore each of these key components:
1. Flour
Flour is the backbone of any cake recipe. For a light and fluffy texture, opt for all-purpose flour or cake flour, depending on the recipe. Cake flour has a lower protein content, which helps create a finer, softer crumb—perfect for special occasion cakes. Be sure to sift the flour to remove lumps and ensure a smooth batter.
2. Sugar
Sugar doesn’t just add sweetness; it also contributes to the cake’s moisture and texture. Granulated sugar is most commonly used in cake recipes, but some variations might call for brown sugar for a deeper, caramel-like flavor. For added flair, you can use powdered sugar for dusting or in your frosting.
3. Eggs
Eggs play a vital role in binding the ingredients together and giving the cake structure. They also add richness and contribute to the cake’s fluffy texture. Use fresh, room-temperature eggs to ensure even mixing and better volume when whipping.
4. Butter
Butter is essential for flavor and moisture. It adds richness and contributes to the cake’s tender crumb. For a lighter cake, you can substitute butter with oil or a mix of the two, but butter remains the preferred choice for a classic, buttery flavor. Make sure the butter is softened to room temperature for easy mixing.
5. Food Coloring
If you’re looking to add a romantic or festive touch to your cake, food coloring is a must. Whether you’re creating a vibrant red velvet cake or adding a subtle pink hue to the batter, food coloring brings visual appeal. Gel food coloring is recommended for more vibrant colors without altering the batter’s consistency.
6. Flavoring Options
Enhance the taste of your cake with a variety of flavoring options:
- Vanilla Extract: A classic choice that pairs well with almost any cake.
- Almond Extract: Adds a subtle nutty undertone, ideal for special occasions.
- Citrus Zest: Lemon or orange zest adds a bright, fresh flavor to your cake.
- Chocolate or Cocoa Powder: Perfect for creating a rich and indulgent chocolate heart-shaped cake.
7. Additional Ingredients to Consider
- Leavening Agents: Baking powder or baking soda helps the cake rise and achieve a fluffy texture.
- Milk or Buttermilk: Adds moisture and a slight tang for extra flavor.
- Decorative Additions: Heart-shaped cherries, edible glitter, or chocolate chips can be incorporated for a creative twist.
By using these carefully selected ingredients, you’ll ensure your heart-shaped cake tastes as amazing as it looks. The combination of classic baking staples with creative flavoring options lets you customize the cake to suit any occasion or personal preference.
Optional Decorations for Your Heart-Shaped Cake
Decorations are what elevate your heart-shaped cake from a simple dessert to a stunning centerpiece. Whether you’re going for an elegant, romantic look or a fun and festive vibe, optional decorations allow you to express your creativity and make the cake perfectly suited to the occasion. Here’s a detailed look at some popular and versatile decoration options:
1. Fondant
Fondant is a pliable, sugar-based dough that can be rolled out and used to cover your cake for a smooth, polished finish. It’s perfect for creating a professional, bakery-style appearance.
- Uses: Cover the entire cake or cut out shapes like hearts, flowers, or letters to adorn the top.
- Pro Tips: Dust your surface with powdered sugar or cornstarch when rolling out fondant to prevent sticking. You can also use gel food coloring to customize the color.
- Occasions: Fondant is great for elegant events such as weddings, anniversaries, or milestone birthdays.
2. Chocolate Ganache
Chocolate ganache adds a luxurious, glossy finish to your cake, making it irresistibly decadent.
- How to Use: Pour warm ganache over the cake to create a smooth coating or let it drip down the sides for a trendy “drip cake” effect.
- Flavors: Use dark chocolate for richness, milk chocolate for sweetness, or white chocolate for a neutral base that can be colored.
- Occasions: Ganache works wonderfully for romantic celebrations like Valentine’s Day or an anniversary, where indulgence is key.
3. Sprinkles
Sprinkles are a fun and easy way to add a splash of color and texture to your cake.
- Types: Choose from classic rainbow sprinkles, metallic beads, heart-shaped sprinkles, or themed options to match your occasion.
- How to Apply: Gently press sprinkles onto the sides of the frosted cake or scatter them over the top. For a more precise look, use a stencil.
- Occasions: Sprinkles are perfect for festive occasions like birthdays, children’s parties, or Valentine’s celebrations.
4. Edible Flowers
Edible flowers bring a natural, elegant charm to your cake, making it perfect for sophisticated celebrations.
- Types of Flowers: Roses, pansies, violets, and marigolds are popular edible flower choices. Always ensure the flowers are food-safe and pesticide-free.
- How to Use: Arrange the flowers along the border or cluster them in the center for a romantic and delicate touch. Pair them with greenery like edible leaves for a complete look.
- Occasions: Ideal for weddings, bridal showers, and spring or summer-themed events.
5. Additional Decoration Ideas
- Buttercream Details: Use piping bags and tips to create rosettes, swirls, or lace-like patterns around the cake.
- Fruit Garnishes: Fresh strawberries, raspberries, or cherries can enhance both the look and flavor of your cake.
- Gold Leaf or Metallic Accents: Add a luxurious feel with edible gold or silver accents.
- Edible Glitter or Luster Dust: Sprinkle on some sparkle to make the cake shine under the light.
Choosing the Right Decorations
The decorations you choose should match the theme and mood of the occasion. If you’re going for elegance, opt for fondant, ganache, or edible flowers. For a playful vibe, sprinkles and colorful buttercream work best. No matter what you choose, the goal is to enhance the cake’s visual appeal while complementing its flavor.
With these optional decorations, your heart-shaped cake will not only taste amazing but also become a show-stopping centerpiece that guests will admire and remember!
Step-by-Step Guide to Baking the Heart-Shaped Cake
Prepare Your Cake Pan: Grease and Flour Your Heart-Shaped Pan for a Perfect Release
Properly preparing your heart-shaped cake pan is one of the most critical steps in baking. This ensures that your cake bakes evenly and releases easily from the pan without sticking or breaking, preserving its beautiful shape. Follow these simple but important steps to prepare your pan like a pro:
1. Grease the Pan
The first step is to thoroughly grease your heart-shaped pan to prevent the cake from sticking.
- What to Use: You can use softened butter, vegetable shortening, or a non-stick cooking spray.
- How to Apply:
- For butter or shortening, use a pastry brush or a piece of parchment paper to coat the entire inner surface of the pan, paying special attention to the corners and edges of the heart shape.
- If using cooking spray, ensure an even coating by spraying at a consistent distance from the pan.
- Pro Tip: Grease the pan generously but avoid overdoing it, as excess grease can create uneven textures or burnt spots on the cake.
2. Dust with Flour
Once the pan is greased, the next step is to dust it with flour to create a non-stick barrier.
- How to Do It:
- Sprinkle a tablespoon of flour into the greased pan.
- Tilt and rotate the pan so the flour evenly coats the bottom and sides, ensuring full coverage.
- Tap out any excess flour by turning the pan upside down and giving it a gentle tap over the sink or a trash can.
- Why It’s Important: The flour sticks to the grease, forming a thin layer that prevents the batter from clinging to the pan. This step is especially useful for cakes with intricate shapes, like a heart.
3. Line the Bottom with Parchment Paper (Optional)
For an extra layer of protection, consider lining the bottom of the pan with parchment paper. This is especially helpful for cakes with delicate textures or those that might be prone to sticking.
- How to Do It:
- Place the pan on a sheet of parchment paper and trace the heart shape with a pencil.
- Cut out the shape and place it inside the pan after greasing and before flouring.
- Grease and flour the parchment paper lightly as well.
4. Use Baking Spray with Flour (Alternative)
If you’re short on time or prefer a simpler method, opt for a baking spray that includes flour. This all-in-one solution greases and flours the pan in one step, making preparation quicker and easier. Just be sure to spray it evenly for consistent results.
5. Check for Even Coverage
Before pouring in your batter, double-check that the pan is completely covered with grease and flour. Uneven coverage or missed spots can cause the cake to stick in those areas, ruining the heart shape.
Why Proper Pan Preparation Matters
- Preserves Shape: The heart-shaped design is what makes this cake special, so proper preparation ensures it comes out cleanly without tearing or crumbling.
- Promotes Even Baking: A well-prepared pan helps the batter bake uniformly, preventing overcooked edges or undercooked centers.
- Eases Cleanup: Greasing and flouring also make cleanup much easier, as there’s less residue left behind in the pan.
By taking the time to prepare your heart-shaped cake pan properly, you’ll set yourself up for a perfectly baked cake that slides out effortlessly, ready to be decorated and enjoyed. It’s a simple but essential step that guarantees success!
Mix the Batter: Step-by-Step Recipe for a Classic Vanilla or Chocolate Cake
The batter is the foundation of your heart-shaped cake, and mixing it properly is essential for achieving the perfect texture and flavor. Whether you choose the timeless elegance of vanilla or the rich indulgence of chocolate, following these step-by-step instructions will ensure your batter is smooth, well-combined, and ready to bake.
Step 1: Gather Your Ingredients
Start by assembling all the necessary ingredients. For both vanilla and chocolate cakes, you’ll need:
Classic Vanilla Cake Ingredients:
- 2 ½ cups all-purpose flour
- 2 ½ teaspoons baking powder
- ½ teaspoon salt
- ¾ cup unsalted butter, softened
- 1 ¾ cups granulated sugar
- 4 large eggs, at room temperature
- 1 tablespoon pure vanilla extract
- 1 cup whole milk
Classic Chocolate Cake Ingredients (adjustments):
- Replace ½ cup of flour with ½ cup unsweetened cocoa powder
- Add 1 teaspoon espresso powder (optional, to enhance the chocolate flavor)
Step 2: Preheat the Oven and Prepare the Pan
Before you start mixing, preheat your oven to 350°F (175°C). Grease and flour your heart-shaped cake pan (refer to the earlier section on pan preparation for detailed instructions).
Step 3: Mix the Dry Ingredients
In a medium-sized mixing bowl, combine the dry ingredients.
- For vanilla: Whisk together the flour, baking powder, and salt until evenly mixed.
- For chocolate: Whisk the flour, cocoa powder, baking powder, salt, and espresso powder.
Set the dry mixture aside.
Step 4: Cream the Butter and Sugar
In a large mixing bowl, cream together the softened butter and granulated sugar using a stand mixer or hand mixer.
- Beat on medium speed for 2-3 minutes, or until the mixture is light, fluffy, and pale in color. This step incorporates air into the batter, creating a tender cake.
Step 5: Add the Eggs
- Add the eggs one at a time, beating well after each addition to ensure they’re fully incorporated.
- Scrape down the sides of the bowl with a spatula as needed to avoid any unmixed batter.
- Mix in the vanilla extract (for chocolate cake, you can also add ½ teaspoon of almond or orange extract for a unique twist).
Step 6: Combine Wet and Dry Ingredients
Alternate adding the dry ingredients and milk to the butter-sugar mixture.
- Begin by adding ⅓ of the dry mixture and mix on low speed until just combined.
- Add ½ cup of milk and mix until incorporated.
- Repeat this process, ending with the last portion of dry ingredients.
- Be careful not to overmix, as this can make the cake dense. Stop mixing as soon as the batter is smooth and uniform.
Step 7: Add Optional Mix-Ins (If Desired)
If you’d like to customize your cake, now is the time to fold in extras such as:
- Chocolate chips or chunks
- Fresh berries (for vanilla cake)
- Crushed nuts or coconut flakes
Step 8: Pour Batter into the Heart-Shaped Pan
Carefully pour the batter into your prepared heart-shaped pan, using a spatula to spread it evenly. Tap the pan gently on the countertop to release any air bubbles trapped in the batter.
Step 9: Bake the Cake
- Place the pan in the preheated oven and bake for 30-35 minutes for a standard-sized cake (adjust time for smaller or larger pans).
- Check for doneness by inserting a toothpick into the center of the cake. If it comes out clean or with a few moist crumbs, the cake is ready.
Step 10: Cool the Cake
- Let the cake cool in the pan for 10-15 minutes.
- Gently loosen the edges with a butter knife or offset spatula, then invert the cake onto a cooling rack. Allow it to cool completely before decorating.
Pro Tips for Perfect Batter
- Room Temperature Ingredients: Ensure your butter, eggs, and milk are at room temperature for better mixing and even texture.
- Measure Accurately: Use measuring cups for dry ingredients and a liquid measuring cup for milk to avoid any imbalances.
- Don’t Overmix: Overmixing activates gluten, leading to a dense cake. Mix just until everything is combined.
With this easy-to-follow recipe, your heart-shaped vanilla or chocolate cake batter will be perfectly prepared and ready to bake into a show-stopping dessert!
Bake to Perfection: Tips for Even Baking and Checking for Doneness
Baking your heart-shaped cake to perfection is the final step in achieving a beautifully moist and evenly cooked dessert. To ensure the best results, it’s important to follow a few key techniques and keep a close eye on the baking process. Here’s everything you need to know to bake your cake like a pro:
1. Preheat Your Oven
Preheating your oven is crucial for even baking. An oven that isn’t properly preheated can cause uneven rising or undercooked centers.
- Set the Temperature: Most cakes bake well at 350°F (175°C). Double-check your recipe for the recommended temperature.
- Allow Time: Let your oven preheat for at least 10-15 minutes before placing your cake inside.
2. Use the Right Oven Placement
The position of your cake in the oven significantly impacts how evenly it bakes.
- Place the Pan on the Center Rack: This ensures that the heat is distributed evenly around the cake.
- Avoid Overcrowding: If you’re baking multiple cakes, leave space between the pans to allow for proper air circulation.
3. Prevent Uneven Rising
Uneven rising or doming can affect the final look of your heart-shaped cake.
- Use Bake-Even Strips: These are damp fabric strips you wrap around the cake pan to regulate heat and prevent doming.
- Rotate the Pan: About halfway through baking, gently rotate the cake pan to ensure even browning. However, avoid opening the oven door too often, especially in the first 15-20 minutes, as this can cause the cake to sink.
4. Check for Doneness
Knowing when your cake is fully baked is critical to achieving the perfect texture—moist but not undercooked, and light but not dry. Here are the best methods to test doneness:
- Toothpick Test: Insert a toothpick into the center of the cake. If it comes out clean or with a few moist crumbs, the cake is done. If batter sticks to the toothpick, bake for a few more minutes and test again.
- Light Spring Test: Gently press the center of the cake with your fingertip. If it springs back, it’s ready. If your finger leaves an indentation, the cake needs more time.
- Edge Test: Observe the edges of the cake. When it’s done, the edges will begin to pull slightly away from the sides of the pan.
5. Be Mindful of Baking Time
- Follow the Recipe Guidelines: Check the recipe for the approximate baking time, but remember that every oven varies slightly.
- Start Checking Early: Begin checking for doneness about 5 minutes before the minimum baking time. This prevents overbaking, which can lead to a dry cake.
- Stay Patient: Avoid rushing or increasing the temperature to speed up baking—it can result in uneven cooking or a burnt exterior.
6. Cool the Cake Properly
Proper cooling is just as important as baking.
- Initial Cooling: Once the cake is baked, let it cool in the pan for 10-15 minutes to allow it to set.
- Remove from Pan: Run a knife along the edges to loosen the cake, then invert it onto a cooling rack.
- Let it Cool Completely: Decorating a warm cake can cause the frosting or decorations to melt, so ensure the cake is fully cooled before moving to the next step.
Troubleshooting Common Baking Issues
- Cake is Undercooked: If the cake looks raw in the center but the edges are done, cover it loosely with aluminum foil to prevent over-browning and bake for a few extra minutes.
- Cake is Overcooked or Dry: Reduce baking time in future attempts or test your oven’s accuracy with an oven thermometer.
- Uneven Texture: This can occur if the batter wasn’t mixed evenly or if the oven’s heat wasn’t consistent. Always sift dry ingredients and mix thoroughly but gently to avoid overmixing.
By following these tips and keeping a close eye on your cake while it bakes, you’ll achieve a perfectly baked heart-shaped cake with an even texture, a moist crumb, and a gorgeous golden finish—ready to be decorated and enjoyed!
Creative Decoration Ideas for Any Occasion

Romantic Decorations: Buttercream Rosettes, Edible Glitter, or Chocolate-Dipped Strawberries
Decorating your heart-shaped cake is where the magic happens! Adding romantic decorations transforms a simple dessert into a stunning centerpiece that’s perfect for special occasions like Valentine’s Day, anniversaries, weddings, or proposals. Whether you prefer timeless elegance or playful charm, these romantic decoration ideas will elevate your cake and leave a lasting impression.
1. Buttercream Rosettes: The Classic Touch of Elegance
Buttercream rosettes are a timeless way to adorn a cake with a soft, romantic look. These delicate designs mimic the beauty of real roses, making them ideal for love-filled celebrations.
- How to Create Rosettes:
- Fill a piping bag fitted with a star tip (e.g., Wilton 1M) with your desired buttercream color.
- Hold the piping bag at a 90-degree angle to the cake’s surface and start piping a spiral, working outward in a continuous motion.
- Stop squeezing the bag and lift it away to complete the rosette.
- Color Palette:
- Choose soft pinks, whites, or reds for a traditional romantic feel.
- Ombre designs with varying shades of the same color add depth and dimension.
- Placement Ideas:
- Cover the entire top of the cake with rosettes for a “bouquet” effect.
- Add rosettes along the edges or around the base for subtle elegance.
2. Edible Glitter: A Sparkling Touch of Romance
Edible glitter brings a magical, sparkling quality to your cake, making it glisten under the light. It’s perfect for adding drama and sophistication to your heart-shaped cake.
- How to Use Edible Glitter:
- Sprinkle glitter lightly over the entire cake for a subtle shimmer.
- Highlight specific areas like the rosettes or piped decorations to make them stand out.
- Use stencils to create glittery patterns, such as hearts or stars, on the cake’s surface.
- Types of Edible Glitter:
- Go for gold or silver glitter for an elegant, luxurious look.
- Choose pink, red, or pearl tones for a softer, romantic vibe.
- Pro Tip: Use a small, dry brush or a shaker for even application and to avoid overdoing it.
3. Chocolate-Dipped Strawberries: Decadent and Romantic
Chocolate-dipped strawberries are a decadent decoration that brings together two classic romantic symbols: chocolate and strawberries. These make the cake not only beautiful but also extra delicious.
- How to Make Chocolate-Dipped Strawberries:
- Wash and dry fresh strawberries thoroughly. Any moisture can prevent the chocolate from adhering properly.
- Melt your chocolate (dark, milk, or white) in a microwave or double boiler.
- Hold each strawberry by the stem and dip it into the melted chocolate, allowing the excess to drip off.
- Place the dipped strawberries on parchment paper and let them set at room temperature or in the fridge.
- For added flair, drizzle white or colored chocolate over the dipped strawberries or sprinkle them with crushed nuts, edible pearls, or sugar crystals.
- How to Arrange Them:
- Place the strawberries along the border of the cake for a bold accent.
- Arrange them in the center of the cake, forming a heart-shaped cluster.
- Add a single chocolate-dipped strawberry on top of each buttercream rosette for an eye-catching combination.
4. Additional Romantic Decoration Ideas
- Drip Effect: Add a chocolate or colored ganache drip around the edges of the cake for a modern, romantic look.
- Fresh Flowers: Incorporate edible flowers like roses, violets, or pansies to enhance the cake’s romantic aesthetic.
- Personalized Toppers: Use heart-shaped or monogrammed cake toppers made from fondant, chocolate, or sugar for a customized touch.
- Luster Dust: Dust the cake with edible luster dust for a metallic, glowing effect.
- Heart-Shaped Accents: Cut fondant or chocolate into heart shapes and place them on the sides or top of the cake for a playful yet romantic touch.
How to Match Decorations with Occasions
- Valentine’s Day: Focus on red, pink, and white themes with plenty of hearts and glitter.
- Weddings/Anniversaries: Opt for subtle colors like ivory, blush, and gold, with elegant rosettes and edible flowers.
- Proposals: Highlight the romantic mood with chocolate-dipped strawberries and a decorative topper that says “Love” or “Marry Me.”
Pro Tips for Romantic Cake Decorating
- Consistency Matters: Use buttercream with the right consistency for smooth piping and precise details.
- Choose Fresh Ingredients: Use the freshest strawberries and flowers to ensure they look vibrant and appealing.
- Keep it Balanced: Avoid overcrowding your cake with too many decorations. A clean, simple design often makes a stronger impact.
- Practice Piping: If you’re new to decorating, practice your rosettes and designs on parchment paper before applying them to the cake.
With buttercream rosettes, edible glitter, and chocolate-dipped strawberries, you can turn your heart-shaped cake into a romantic masterpiece that tastes as incredible as it looks. These decorations will wow your loved ones and make any celebration unforgettable!
Birthday Themes: Vibrant Sprinkles, Fondant Characters, or Colorful Frosting
When it comes to birthdays, a heart-shaped cake offers endless opportunities for creative, fun, and festive designs. Whether you’re making a cake for a child’s birthday, a friend, or a family member, tailoring the decorations to a theme can make the celebration even more memorable. Here’s how you can add vibrant energy and personality to your cake using sprinkles, fondant characters, and colorful frosting.
1. Vibrant Sprinkles: Instant Festivity and Fun
Sprinkles are the easiest way to add bursts of color and excitement to your birthday cake. They come in a variety of shapes, sizes, and colors, making them perfect for any birthday theme.
- Types of Sprinkles to Use:
- Rainbow Sprinkles: Ideal for a cheerful and playful vibe.
- Metallic Sprinkles: Use gold or silver sprinkles for a more sophisticated birthday look.
- Themed Sprinkles: Look for sprinkles in shapes like stars, hearts, or even animals to match the party theme.
- How to Use Sprinkles:
- Full Coating: Cover the entire surface of the cake with sprinkles for a bold and vibrant effect.
- Border Accent: Sprinkle along the edges of the cake or just the base for a more understated look.
- Pattern Designs: Use a stencil to create sprinkle shapes or numbers on the cake (e.g., the birthday age).
- Pro Tip: For even coverage, press the sprinkles gently into the frosting with your fingers or a small offset spatula before it sets.
2. Fondant Characters: Personalized and Playful Decorations
Fondant characters are perfect for adding a unique, personalized touch to your birthday cake. They allow you to incorporate specific themes and bring the birthday person’s interests to life.
- Ideas for Fondant Characters:
- Children’s Birthdays: Create characters like animals, princesses, superheroes, or cartoon favorites.
- Teen or Adult Birthdays: Sculpt items like flowers, sports equipment, or symbols of their hobbies (e.g., a guitar, camera, or book).
- Themed Parties: For example, if the birthday has a “beach party” theme, add fondant palm trees, flip-flops, and seashells.
- How to Create Fondant Characters:
- Use pre-made fondant or make your own from scratch. Add food coloring to customize the colors.
- Shape the fondant using your hands or fondant tools to create detailed designs.
- Attach smaller details to larger shapes using a dab of water or edible glue.
- Placement Ideas:
- Arrange the characters on top of the cake as a centerpiece.
- Use small fondant decorations along the sides of the cake to complement the main design.
3. Colorful Frosting: Bright and Bold Designs
Colorful frosting is a fantastic way to bring a birthday cake to life. It’s versatile, easy to work with, and allows for endless design possibilities.
- Color Options:
- Primary Colors: Great for kids’ birthdays or classic party themes.
- Pastel Shades: Ideal for a soft, elegant, or whimsical feel.
- Bold Tones: Electric blues, neon pinks, and bright yellows can add a modern and energetic vibe.
- Techniques for Using Colorful Frosting:
- Ombre Effect: Blend two or more shades of frosting from light to dark for a gradient effect.
- Striped Piping: Add multiple colors to one piping bag for a striped or rainbow effect when piping rosettes or swirls.
- Marbled Design: Swirl two or three colors together lightly for a tie-dye or marbled look.
- Design Ideas:
- Write the birthday person’s name and age using contrasting frosting colors.
- Create colorful borders or patterns, such as polka dots or zigzags, on the cake’s surface.
4. How to Combine Themes for a Show-Stopping Cake
- Rainbow Extravaganza: Use colorful frosting for the base, sprinkle the edges with rainbow sprinkles, and add fondant stars or clouds.
- Cartoon-Themed Cake: Add fondant characters on top of a brightly frosted cake, and use sprinkles to outline the design.
- Elegant Celebration: Cover the cake in pastel frosting, decorate the edges with metallic sprinkles, and add fondant flowers or numbers for a chic look.
5. Birthday Decoration Ideas by Age Group
- For Kids:
- Incorporate their favorite cartoon characters or animals with fondant.
- Use vibrant rainbow frosting and confetti sprinkles for a playful look.
- For Teens:
- Choose bold, modern colors like neon green or electric blue.
- Add edible glitter and themed sprinkles (e.g., stars for a “galaxy” theme).
- For Adults:
- Opt for elegant designs like metallic sprinkles and minimalistic fondant accents.
- Stick to sophisticated color palettes such as gold and white or blush and rose gold.
Pro Tips for Decorating Birthday Cakes
- Plan Ahead: Decide on the theme and gather all your decorating tools and ingredients in advance.
- Practice Makes Perfect: If you’re trying a new technique, practice on parchment paper or a dummy cake first.
- Use High-Quality Ingredients: Vibrant sprinkles and good-quality fondant make a noticeable difference in the final look.
- Let Your Cake Speak: Incorporate elements that reflect the personality, interests, or age of the birthday person.
With vibrant sprinkles, fondant characters, and colorful frosting, your heart-shaped birthday cake will be the life of the party. These decorations are sure to bring smiles, capture attention, and make the birthday celebration truly unforgettable!
Minimalist Looks: Smooth Buttercream with Subtle Details Like Gold Leaf or Pearls
Sometimes, less is more, and a minimalist approach to decorating your heart-shaped cake can exude elegance and sophistication. Smooth buttercream, combined with delicate accents like gold leaf or pearls, creates a refined and timeless design that’s perfect for weddings, anniversaries, or any special occasion where simplicity speaks volumes. Here’s how to master the art of minimalism in cake decorating.
1. Smooth Buttercream: The Perfect Base for Minimalist Elegance
Creating a flawless buttercream finish is the cornerstone of minimalist cake design. A smooth, even surface sets the stage for subtle details and highlights the clean beauty of your heart-shaped cake.
- How to Achieve a Smooth Buttercream Finish:
- Crumb Coat: Start with a thin crumb coat to seal in any loose crumbs. Chill the cake for 15–30 minutes to set the layer.
- Apply the Final Layer: Use an offset spatula or a bench scraper to spread a thick, even layer of buttercream over the cake.
- Smooth the Surface: Hold a bench scraper at a 90-degree angle and slowly rotate the cake on a turntable to achieve a perfectly smooth finish.
- Chill Again: Place the cake in the refrigerator for a few minutes to set the buttercream before adding decorations.
- Color Options:
- Neutral Tones: White, cream, or soft pastel shades for an understated look.
- Monochrome: Stick to one color for a cohesive and modern vibe.
- Soft Gradients: Create an ombre effect with two or three closely related shades.
2. Gold Leaf: A Touch of Luxury and Sophistication
Gold leaf is an edible decoration that adds a hint of opulence without overwhelming the minimalist aesthetic. It catches the light beautifully, giving your cake an elegant, high-end appearance.
- How to Use Gold Leaf:
- Tear small pieces of edible gold leaf and gently press them onto the buttercream using a clean, dry brush or tweezers.
- Apply gold leaf sparingly to accent specific areas, such as one side of the cake, the edges, or the center.
- For a bolder look, cover one section of the cake entirely in gold leaf for a dramatic effect.
- Placement Ideas:
- Add gold leaf to the tips of piped buttercream details, like rosettes or swirls.
- Use it to highlight the edges of the heart shape for a luxurious outline.
3. Pearls: Timeless and Subtle Elegance
Edible pearls or sugar pearls add a classic and refined touch to a minimalist cake. They’re delicate, versatile, and perfect for enhancing the heart-shaped design.
- Types of Pearls to Use:
- White or Ivory Pearls: For a traditional, wedding-inspired look.
- Metallic Pearls: Silver or gold for a more glamorous aesthetic.
- Pastel Pearls: Light pink, lavender, or blue for a softer, romantic feel.
- How to Use Pearls:
- Border Accents: Place pearls along the base or edges of the cake for a clean, polished finish.
- Scattered Design: Arrange pearls randomly across the cake for an artistic and whimsical look.
- Centerpiece Detail: Use pearls to outline the heart shape or create a delicate pattern on the cake’s surface.
4. Subtle Texture and Details
While minimalism focuses on simplicity, adding subtle textures and details can elevate the design without overpowering it.
- Piping Details: Use a small round piping tip to add fine, minimalist patterns like dots, lines, or small hearts.
- Watercolor Effect: Lightly blend two or more colors of buttercream for a soft, dreamy look.
- Geometric Patterns: Use stencils to create clean, modern shapes with edible shimmer dust or contrasting frosting.
- Drizzle of Ganache: Add a thin, controlled drizzle of white or pastel-colored ganache around the edges for a minimalist drip effect.
5. Why Choose a Minimalist Design?
- Versatile Appeal: Minimalist cakes are suitable for any occasion, from romantic dinners to sophisticated events.
- Focus on Quality: With fewer decorations, the cake’s craftsmanship and flavors become the star of the show.
- Timeless Beauty: Simple designs never go out of style and can be customized for modern or traditional themes.
Pro Tips for a Perfect Minimalist Cake
- Invest in Tools: Use a high-quality offset spatula and bench scraper for the smoothest buttercream finish.
- Less is More: Resist the urge to over-decorate. Stick to one or two key elements to maintain a clean look.
- Work with Precision: Small details like gold leaf and pearls require patience and a steady hand for a flawless finish.
- Choose a Neutral Base Flavor: Vanilla, almond, or light chocolate flavors complement the understated aesthetic of minimalist cakes.
With smooth buttercream, subtle gold leaf accents, and delicate pearls, your heart-shaped cake will be a masterpiece of minimalist design. Its simplicity will captivate your guests and let the elegance of the details shine through. Whether it’s for an anniversary, engagement, or an intimate celebration, this minimalist style is sure to impress!
Tips for Perfecting Your Heart-Shaped Cake

How to Avoid Common Mistakes: Overmixing, Uneven Baking, or Collapsing Cakes
Baking a heart-shaped cake can be a delightful experience, but it’s not without its challenges. From overmixing your batter to dealing with cakes that bake unevenly or collapse, understanding common mistakes and how to avoid them is crucial for success. Here’s a guide to help you steer clear of these pitfalls and achieve a perfectly baked cake every time.
1. Overmixing: The Enemy of Tender Cakes
Overmixing the batter can lead to a dense, rubbery texture instead of a soft and fluffy cake. This happens because excessive mixing develops too much gluten in the flour, which is great for bread but not ideal for cakes.
- How to Avoid Overmixing:
- Mix Dry and Wet Ingredients Separately: Combine your dry ingredients in one bowl and your wet ingredients in another before gradually incorporating them together.
- Use the Right Speed: When mixing with a stand or hand mixer, use the lowest speed setting to ensure gentle incorporation of ingredients.
- Mix Just Until Combined: Stop mixing as soon as you no longer see streaks of flour. Overmixing can occur quickly, so keep an eye on your batter.
- Fold Ingredients Carefully: If you’re adding extras like chocolate chips or fruit, fold them in with a spatula to avoid overworking the batter.
- Signs of Overmixing:
- The batter looks overly elastic or sticky.
- The baked cake turns out dense or chewy rather than light and airy.
2. Uneven Baking: Troubleshooting Hot Spots and Sinking Centers
Uneven baking can result in a cake that’s overcooked on the edges but undercooked in the middle, or one that rises unevenly.
- How to Ensure Even Baking:
- Use the Right Bakeware: Choose a high-quality heart-shaped cake pan with even heat distribution. Thin, inexpensive pans often cause uneven baking.
- Preheat the Oven: Always preheat your oven for at least 10–15 minutes to ensure it reaches the correct temperature before you bake.
- Check Your Oven Temperature: Use an oven thermometer to confirm that your oven is heating accurately. Sometimes ovens run hotter or cooler than their settings indicate.
- Position the Pan Correctly: Place your cake pan in the center of the oven to allow even air circulation around it.
- Rotate the Pan: Halfway through baking, carefully rotate the pan to promote even cooking, especially if your oven has hot spots.
- Pro Tip for Heart-Shaped Pans:
- Heart-shaped pans can have thicker or narrower areas. For consistent baking, consider using cake strips around the pan to keep the edges from baking faster than the center.
3. Collapsing Cakes: A Common Frustration
Few things are more disheartening than seeing your cake collapse after all your hard work. This can occur due to several reasons, including overmixing, underbaking, or sudden changes in temperature.
- How to Prevent Cake Collapse:
- Don’t Overfill the Pan: Fill your cake pan no more than two-thirds full to allow the batter room to rise.
- Measure Ingredients Precisely: Too much or too little of key ingredients like leavening agents (baking powder or soda) can cause structural issues.
- Bake Until Fully Set: Test your cake for doneness by inserting a toothpick into the center. If it comes out clean or with just a few crumbs, the cake is ready.
- Avoid Opening the Oven Door: Opening the door too soon can cause a sudden drop in temperature, making the cake collapse. Wait until at least 75% of the baking time has elapsed before checking.
- Cool the Cake Properly: Let the cake cool in the pan for 10–15 minutes before transferring it to a wire rack. Moving it too soon can cause the structure to weaken.
4. Additional Tips to Avoid Mistakes
- Use Room Temperature Ingredients: Cold ingredients can lead to uneven mixing and improper emulsification, which affects the cake’s structure.
- Sift Dry Ingredients: Sifting ensures there are no lumps in your flour, cocoa powder, or leavening agents, helping the batter mix smoothly.
- Follow the Recipe Closely: Baking is a science. Altering ratios or skipping steps can lead to unpredictable results.
Common Cake Mistakes and Quick Fixes
- Problem: Cake rose unevenly and cracked on top.
- Solution: Lower the oven temperature by 25°F (about 15°C) and bake for a slightly longer time. High heat can cause rapid rising and cracking.
- Problem: Cake sticks to the pan.
- Solution: Always grease and flour your pan thoroughly, or use parchment paper to line the bottom for easy release.
- Problem: Cake is dry and crumbly.
- Solution: Avoid overbaking, and consider adding a simple syrup glaze to moisten the layers.
By understanding these common mistakes and how to prevent them, you can bake a heart-shaped cake that looks as amazing as it tastes. Mastering these tips will ensure that your cake turns out perfectly, whether you’re baking for a special occasion or simply indulging your creative side.
Using a Regular Pan: Create a Heart Shape with Round and Square Pans if You Don’t Have a Heart-Shaped One
Not having a heart-shaped pan shouldn’t stop you from making a stunning heart-shaped cake. With a little creativity, you can use standard round and square pans to achieve the same result. This technique is not only practical but also adds a fun DIY element to your baking adventure. Here’s how to create a heart-shaped cake without a specialty pan.
1. Pans You’ll Need
To create a heart shape, you’ll need:
- One Round Pan (the same size as your square pan, ideally 8 or 9 inches).
- One Square Pan (match the size of your round pan for proportional results).
Using pans of equal sizes ensures that the pieces will fit together seamlessly to form the heart shape.
2. How to Assemble the Heart Shape
Follow these steps to create your heart-shaped cake:
- Bake Two Cakes:
- Prepare your cake batter and divide it equally between the round and square pans.
- Bake according to the recipe instructions, ensuring both cakes are fully cooked and cooled before proceeding.
- Cut the Round Cake:
- Once the round cake has cooled, cut it evenly in half using a sharp knife.
- You’ll now have two semi-circles that will form the rounded top of the heart.
- Position the Cakes:
- Place the square cake on a large cake board or serving platter so that one corner points downward, forming a diamond shape.
- Align the two semi-circles on the top two sides of the diamond to create the heart shape.
- Secure the Pieces:
- Use a thin layer of frosting (crumb coat) to “glue” the semi-circles to the square base.
- Smooth out the edges with frosting to blend the pieces together and hide the seams.
3. Decorating Your Heart-Shaped Cake
Once you’ve assembled the shape, you can decorate it just like you would any heart-shaped pan cake:
- Buttercream Base: Apply a crumb coat, chill the cake, and then add a smooth final layer of frosting.
- Borders and Edges: Pipe borders along the edges to define the heart shape. Use rosettes, stars, or a shell border for a polished look.
- Sprinkles or Accents: Highlight the heart shape with sprinkles, edible glitter, or a drizzle of chocolate ganache.
4. Pro Tips for Best Results
- Prepare Your Pans Well: Grease and flour the pans or line them with parchment paper to ensure easy release.
- Use a Serrated Knife for Cutting: A serrated knife helps make clean cuts without crumbling the cake.
- Work with Chilled Cakes: Slightly chilled cakes are firmer and easier to handle when assembling the shape.
- Plan Your Display: Choose a cake board or platter that complements the heart shape and allows enough space for decorations.
5. Benefits of DIY Heart Shapes
- Cost-Effective: No need to invest in a heart-shaped pan that you might use only occasionally.
- Versatile Sizes: Adjust the pan sizes to create larger or smaller cakes based on your needs.
- Customizable Shape: If you want a unique or exaggerated heart shape, you can trim the cake further for a more personalized look.
Fun Variations
- Double-Layer Heart: Create two layers of the square and round cakes to make a taller, more dramatic heart-shaped cake.
- Marbled Heart: Use two different cake batters (e.g., chocolate and vanilla) to create a beautiful marbled effect when sliced.
- Themed Heart: Decorate the heart with colors, designs, or toppings that match your occasion, like red and pink for Valentine’s Day or gold and white for anniversaries.
By using round and square pans, you can easily craft a heart-shaped cake that looks professional and thoughtful. This simple technique ensures that anyone, regardless of their bakeware collection, can celebrate love and special moments with a charming, heart-shaped dessert.
Storage and Serving Tips: Keeping Your Cake Fresh and Cutting It Neatly for Presentation
After you’ve baked and decorated your heart-shaped cake to perfection, it’s essential to store it properly to maintain its flavor and texture until it’s time to serve. Additionally, serving the cake neatly ensures that all your hard work is showcased beautifully. Here’s a guide to storing and serving your cake like a pro.
1. Storage Tips: Keeping Your Cake Fresh
Proper storage is crucial to prevent your cake from drying out or losing its flavors.
- Before Decorating:
- If you’re not decorating the cake immediately, wrap each layer tightly in plastic wrap once it’s completely cool.
- Store the wrapped layers at room temperature for up to 2 days or refrigerate for up to 5 days.
- After Decorating:
- Cover the fully decorated cake with a cake dome or place it in a cake box to protect the frosting and decorations.
- If you don’t have a cake dome, tent aluminum foil or plastic wrap loosely over the cake to avoid smudging the decorations.
- Refrigeration:
- Refrigerate cakes with perishable fillings or frostings, such as cream cheese frosting or fresh fruit.
- Store in an airtight container or wrap the cake to prevent it from absorbing refrigerator odors.
- Freezing for Long-Term Storage:
- Undecorated Cake: Wrap each layer in plastic wrap and then in aluminum foil. Store in the freezer for up to 3 months.
- Decorated Cake: Flash freeze the cake for 1–2 hours until the frosting hardens, then wrap it tightly in plastic wrap and foil before freezing.
- Thawing: Remove the cake from the freezer and let it thaw in the refrigerator overnight or at room temperature for a few hours.
2. Serving Tips: Cutting Neatly for Presentation
Cutting a heart-shaped cake neatly can enhance the presentation and ensure each slice looks appealing.
- Chill Before Slicing:
- For cleaner cuts, refrigerate the cake for 15–30 minutes before slicing. This firms up the frosting and reduces smudging.
- Choose the Right Knife:
- Use a long, sharp knife with a straight edge (not serrated) for the cleanest cuts.
- Dip the knife in hot water and wipe it dry before each cut to prevent frosting buildup.
- Cutting a Heart-Shaped Cake:
- Step 1: Start by cutting the cake vertically down the middle from the top point to the bottom tip. This divides the heart into two equal halves.
- Step 2: Slice each half into even vertical strips.
- Step 3: If the strips are too long, cut them horizontally into smaller pieces for uniform portions.
- Alternative: For a more creative approach, cut slices radiating out from the center, following the curve of the heart.
- Portion Size:
- For larger gatherings, keep slices smaller for more servings. For intimate settings, slightly larger slices add a touch of indulgence.
3. Displaying Your Cake for Serving
- Use a Beautiful Cake Stand: A decorative stand adds elegance to your presentation and elevates the cake, making it the centerpiece of the table.
- Clean the Edges: Wipe away any crumbs or frosting smudges on the serving platter for a polished look.
- Add Garnishes: Decorate the serving platter with extras like fresh berries, mint leaves, or edible flowers to complement the cake’s design.
4. How Long Does a Cake Stay Fresh?
- Room Temperature: Cakes with buttercream frosting can stay fresh for up to 2 days in a cool, dry place.
- Refrigerated Cakes: Extend the freshness to 5–7 days, depending on the type of frosting and filling.
- Frozen Cakes: Enjoy within 3 months for the best taste and texture.
5. Quick Tips for Flawless Storage and Serving
- Avoid Sunlight and Heat: Store the cake away from direct sunlight and heat sources to prevent melting or drying out.
- Pre-Slice for Convenience: If serving to a large group, consider pre-slicing the cake to make distribution easier.
- Serve at the Right Temperature: Let refrigerated cakes sit at room temperature for 15–20 minutes before serving for the best flavor and texture.
By following these storage and serving tips, you can ensure that your heart-shaped cake stays fresh, tastes delicious, and looks impressive from the first slice to the last. Proper storage keeps your masterpiece intact, while thoughtful serving techniques make the experience memorable for everyone!
Frequently Asked Questions About Heart-Shaped Cakes

Can I Use This Recipe for Other Cake Shapes?
Absolutely! The beauty of this recipe lies in its versatility. While it’s tailored for a heart-shaped cake, the same ingredients and techniques can be adapted to create cakes of various shapes and sizes. Whether you’re baking for a different theme or simply don’t have a heart-shaped pan, this recipe is your go-to for crafting other delightful cake shapes. Here’s how you can adapt it to fit your creative needs.
1. Using Different Cake Pans
The batter used for this heart-shaped cake works well with most standard cake pans. Consider the following options:
- Round Cake Pans: Ideal for classic layer cakes or single-tiered celebrations.
- Square or Rectangular Pans: Perfect for sheet cakes or base layers for more elaborate designs.
- Bundt Pans: Create a visually appealing ring-shaped cake with minimal decoration needed.
- Cupcake Tins: Turn the batter into individual servings, making it great for parties or events.
- Shaped Pans: Use specialty pans like star, flower, or number shapes for themed celebrations.
Pro Tip: Adjust the baking time based on the size and depth of the pan. Smaller or shallower pans may require less time, while larger or deeper pans may need more. Always perform the toothpick test to check for doneness.
2. Creating Custom Shapes Without Specialty Pans
You don’t always need a specific pan to create unique shapes. With some simple cutting and assembling techniques, you can use round and square pans to craft various designs:
- Heart Shape: As mentioned earlier, combine a square and round cake.
- Butterfly Shape: Cut a round cake in half and position the halves on either side of a rectangle for wings.
- Number or Letter Shapes: Trim rectangular cakes into the desired shapes using a template as a guide.
- Animal or Character Designs: Carve basic shapes like round or square cakes into animals or characters for themed occasions.
Pro Tip: Chill the cake before cutting. This makes it firmer and easier to shape with less crumbling.
3. Scaling the Recipe for Larger or Smaller Cakes
This recipe can be scaled up or down to suit the size of your cake.
- Doubling the Recipe: Perfect for larger celebrations or multi-layered cakes. Ensure your mixer can handle the increased volume of batter.
- Halving the Recipe: Ideal for small gatherings or mini cakes. Use smaller pans and reduce baking time accordingly.
- Converting for Cupcakes: This recipe yields moist and fluffy cupcakes. Simply fill the cupcake liners ⅔ full and bake for 15–20 minutes.
Pro Tip: Always maintain the ingredient ratios when scaling the recipe to preserve the cake’s texture and flavor.
4. Decorating Ideas for Other Shapes
The same decoration techniques used for a heart-shaped cake can be applied to different designs:
- Buttercream Details: Use piping bags to add borders, rosettes, or custom designs on any shape.
- Fondant Covers: Smooth fondant works beautifully on round, square, or uniquely shaped cakes.
- Themed Toppings: Add decorations like sprinkles, edible glitter, or toppers that match the occasion or theme.
Pro Tip: For oddly shaped cakes, use a crumb coat to smooth out the edges before applying the final layer of frosting or fondant.
5. Benefits of Using This Recipe for Other Shapes
- Consistency: This recipe produces a reliable, moist, and flavorful cake every time, regardless of the shape.
- Versatility: Works for a variety of occasions and themes.
- Customizable Flavors: Swap the vanilla or chocolate base for flavors like lemon, red velvet, or funfetti to suit your preferences.
6. Quick Tips for Success
- Choose the Right Pan Size: Refer to your recipe’s yield to avoid overfilling or underfilling your pan.
- Monitor Baking Times: Different shapes and sizes require adjustments to baking time. Check frequently to prevent overbaking.
- Plan for Stability: If constructing complex designs, use dowels or supports to keep the layers stable.
Whether you’re making a traditional round birthday cake, a whimsical animal shape, or a tray of cupcakes, this recipe provides the perfect foundation. Its adaptability ensures you can bring any cake vision to life, making it a favorite for bakers of all levels.
What’s the Best Frosting for a Heart-Shaped Cake?
Choosing the right frosting for a heart-shaped cake is essential for achieving a polished look and enhancing its flavor. The frosting not only holds the cake together but also allows for creative decorating that matches the occasion. Whether you want a simple, elegant finish or an elaborate design, there’s a frosting to suit every preference. Here’s an in-depth look at the best frosting options for your heart-shaped cake and how to use them effectively.
1. Buttercream Frosting: A Classic and Versatile Choice
Buttercream is one of the most popular frostings due to its smooth texture, rich flavor, and versatility.
- Why It’s Ideal for a Heart-Shaped Cake:
- Easy to spread and smooth over the unique curves of a heart shape.
- Can be tinted with food coloring to match any theme (e.g., pink or red for Valentine’s Day).
- Great for piping decorations like rosettes, borders, or intricate designs.
- Types of Buttercream:
- American Buttercream: Sweet, simple to make, and holds up well for most designs.
- Swiss Meringue Buttercream: Silky and less sweet, perfect for a refined finish.
- Italian Meringue Buttercream: Stable and glossy, ideal for detailed piping.
- Pro Tips:
- Use an offset spatula to achieve a smooth finish.
- Chill the cake briefly after applying a crumb coat for easier final frosting.
2. Cream Cheese Frosting: Tangy and Rich
For cakes with a rich flavor, such as red velvet or carrot cake, cream cheese frosting is an excellent choice.
- Why It’s Ideal for a Heart-Shaped Cake:
- The slightly tangy flavor complements sweet cakes beautifully.
- Its creamy consistency makes it easy to spread over the cake’s surface.
- Decoration Tips:
- Pair with a dusting of edible glitter or a scattering of fresh berries for a romantic look.
- Use it for rustic, semi-naked cakes where the layers peek through the frosting.
- Pro Tips:
- Chill the frosting slightly before applying to make it firmer and easier to work with.
- Avoid over-whipping to maintain its creamy texture.
3. Ganache: Luxurious and Elegant
Ganache is a mixture of chocolate and cream, offering a glossy and decadent finish.
- Why It’s Ideal for a Heart-Shaped Cake:
- Its smooth, shiny appearance adds a touch of sophistication.
- Creates a dramatic look, especially when poured as a drip design.
- How to Use Ganache:
- Pourable Ganache: Use a slightly warm ganache to pour over the cake for an even coating.
- Whipped Ganache: Chill and whip it to create a fluffy, spreadable frosting.
- Pro Tips:
- For a heart-shaped cake, let the ganache drip elegantly down the sides for a romantic touch.
- Use dark, milk, or white chocolate depending on your flavor preference.
4. Fondant: A Professional Finish
Fondant is ideal if you’re looking for a smooth, polished, and professional appearance.
- Why It’s Ideal for a Heart-Shaped Cake:
- Covers the unique shape seamlessly, creating clean edges.
- Provides a blank canvas for intricate designs, embossing, or edible paint.
- Decoration Ideas:
- Add fondant cutouts, such as hearts, flowers, or initials, to enhance the theme.
- Use luster dust or edible gold leaf for a glamorous finish.
- Pro Tips:
- Apply a thin layer of buttercream or ganache underneath the fondant to help it adhere to the cake.
- Use a fondant smoother to eliminate air bubbles and achieve a flawless finish.
5. Whipped Cream Frosting: Light and Airy
Whipped cream frosting is perfect for those who prefer a lighter option.
- Why It’s Ideal for a Heart-Shaped Cake:
- Its fluffy texture pairs well with delicate or fruity cakes.
- Ideal for minimalist or rustic designs.
- Decoration Ideas:
- Pipe simple swirls or dollops around the edges of the cake.
- Top with fresh fruits, chocolate shavings, or edible flowers for a romantic touch.
- Pro Tips:
- Stabilize the whipped cream with gelatin or a whipped cream stabilizer for better durability.
- Serve the cake shortly after frosting, as whipped cream doesn’t hold up well for long periods.
6. Specialty Frostings: Unique and Flavorful Options
For a creative twist, consider experimenting with these specialty frostings:
- Royal Icing: Great for intricate designs or writing messages on the cake.
- Mirror Glaze: Creates a shiny, reflective surface for a modern, artistic look.
- Peanut Butter Frosting: Adds a rich, nutty flavor that pairs wonderfully with chocolate cake.
7. Choosing the Right Frosting for Your Cake
The best frosting depends on your preferences, the cake’s flavor, and the occasion:
- Romantic Celebrations: Buttercream rosettes or ganache drips create a dreamy vibe.
- Light and Fresh Themes: Whipped cream frosting or cream cheese frosting works well with fruity cakes.
- Sophisticated Designs: Fondant or mirror glaze provides a professional finish.
8. Tips for Frosting Success
- Start with a crumb coat to trap crumbs and create a smooth base.
- Chill the cake after the crumb coat to make final frosting easier.
- Use a turntable for even application and cleaner edges.
- Experiment with piping tips and decorative tools to add texture and detail.
The right frosting can elevate your heart-shaped cake from simple to stunning. Whether you prefer the richness of buttercream, the elegance of ganache, or the lightness of whipped cream, there’s a perfect frosting to suit your occasion and style.
How Can I Make This Cake Gluten-Free or Vegan?
Baking a heart-shaped cake that’s gluten-free or vegan is entirely possible with the right substitutions and techniques. Whether you’re accommodating dietary restrictions or exploring healthier alternatives, these adaptations ensure your cake is just as delicious and beautiful as the original. Here’s a guide to making your heart-shaped cake gluten-free, vegan, or both.
1. Making the Cake Gluten-Free
For a gluten-free version, replacing traditional wheat flour with gluten-free alternatives is key.
- Choosing the Right Flour:
- Use a high-quality gluten-free all-purpose flour blend that includes xanthan gum or guar gum for structure.
- If your blend doesn’t include xanthan gum, add ½ teaspoon per cup of flour to mimic gluten’s binding properties.
- Alternative Flours:
- Almond Flour: Adds a nutty flavor and moisture. Best when combined with other gluten-free flours.
- Coconut Flour: Very absorbent; use sparingly and pair with additional liquid or eggs.
- Oat Flour: Great for a soft texture; ensure it’s certified gluten-free.
- Pro Tips:
- Sift the gluten-free flour to prevent clumping and achieve a smoother batter.
- Avoid overmixing, as gluten-free batters can become dense.
- Testing for Doneness:
- Gluten-free cakes often take a little longer to bake. Use a toothpick to check if it comes out clean.
2. Making the Cake Vegan
Eliminating animal products from your recipe doesn’t mean compromising on taste or texture.
- Replacing Eggs:
- Flax Egg: Mix 1 tablespoon of ground flaxseed with 2½ tablespoons of water. Let it sit for 5 minutes to thicken.
- Chia Egg: Similar to flax egg, but made with chia seeds.
- Applesauce: Use ¼ cup of unsweetened applesauce per egg for a moist texture.
- Mashed Banana: Adds sweetness and works well in denser cakes. Use ¼ cup per egg.
- Substituting Dairy Products:
- Milk: Replace regular milk with plant-based alternatives like almond, soy, coconut, or oat milk.
- Butter: Use vegan butter or coconut oil in equal quantities.
- Cream Cheese or Heavy Cream: Choose vegan cream cheese or whip coconut cream for frostings.
- Pro Tips:
- Add a pinch of baking powder to compensate for the leavening effect of eggs.
- Use unrefined coconut oil for a neutral flavor, or vegan butter for a traditional taste.
3. Making the Cake Gluten-Free and Vegan
Combining both gluten-free and vegan substitutions is straightforward with the right ingredients.
- Recommended Flour Blends:
- Choose a gluten-free blend specifically designed for vegan baking, as these often include additional starches and gums for better texture.
- Liquid Adjustments:
- Gluten-free batters may require more liquid. Add plant-based milk in small increments until you achieve the desired consistency.
- Binders for Structure:
- Combine vegan egg substitutes with xanthan gum to ensure the cake holds together.
- Pro Tips:
- Let the batter rest for 5–10 minutes before baking. This allows the gluten-free flour to absorb the liquid more effectively.
4. Frosting Options for Gluten-Free or Vegan Cakes
- Gluten-Free Frostings: Most frostings, like buttercream or ganache, are naturally gluten-free. Just ensure all ingredients are certified gluten-free.
- Vegan Frostings:
- Vegan Buttercream: Use vegan butter and plant-based milk.
- Coconut Cream Frosting: Whip chilled coconut cream with a touch of powdered sugar and vanilla.
- Vegan Ganache: Use dark chocolate and coconut cream for a rich, dairy-free option.
5. Flavor Variations for Gluten-Free or Vegan Cakes
- Citrus Cake: Add lemon or orange zest for a refreshing twist.
- Chocolate Cake: Use unsweetened cocoa powder or vegan chocolate chips.
- Berry Cake: Fold in fresh or frozen berries for added flavor and moisture.
6. Tips for Success with Gluten-Free or Vegan Baking
- Use Room-Temperature Ingredients: This helps ensure even mixing and better texture.
- Don’t Skip the Crumb Coat: Gluten-free and vegan cakes can be more crumbly; a crumb coat helps create a smooth surface for decorating.
- Bake Low and Slow: Lower the oven temperature slightly and bake for a longer time to avoid dense or undercooked cakes.
- Experiment in Small Batches: Test your substitutions with a small cake before scaling up for larger occasions.
7. Benefits of Gluten-Free and Vegan Cakes
- Accommodates dietary restrictions, making your cake inclusive for everyone.
- Opens up creative opportunities with unique ingredients like almond flour, flaxseed, or coconut cream.
- Adds a healthy twist with nutrient-rich alternatives.
With a few thoughtful substitutions, your heart-shaped cake can be made gluten-free, vegan, or both without sacrificing its charm or flavor. These adaptations ensure that everyone can enjoy a slice, regardless of dietary needs. From choosing the right flours to experimenting with egg replacements, you can create a cake that’s as inclusive as it is delicious!
conclution
Making a heart-shaped cake isn’t just about baking—it’s about creating a centerpiece for love, celebration, and creativity. Whether it’s for a romantic occasion, a birthday, or simply to treat your loved ones, this cake is sure to make any moment special.
Recap of Key Steps
Let’s quickly revisit the essential steps to crafting the perfect heart-shaped cake:
- Choose the Right Tools and Ingredients: Start with a heart-shaped pan or get creative with a round and square pan combination. Select quality ingredients for the best flavor and texture.
- Prepare with Care: Grease and flour your pan for a flawless release, and follow the recipe instructions to mix your batter to perfection.
- Bake Evenly: Pay attention to baking time and temperature to ensure your cake is moist and evenly cooked.
- Decorate Thoughtfully: Whether you prefer elegant buttercream rosettes, minimalist designs, or themed decorations, let your creativity shine.
- Adapt to Preferences: Use gluten-free or vegan substitutions to accommodate dietary needs without compromising on taste or presentation.
Encouragement to Get Creative
Your heart-shaped cake is more than just a dessert—it’s an opportunity to express yourself. Experiment with flavors, colors, and decorations to make the cake uniquely yours. Whether you stick with classic vanilla, opt for rich chocolate, or try something adventurous like red velvet or lemon, there’s no wrong way to make this cake your own.
Don’t hesitate to customize your design to suit the occasion. Add personal touches, such as initials, edible flowers, or themed toppers, to make your cake extra special.
Call-to-Action: Share Your Creations!
We’d love to see how your heart-shaped cakes turn out! Snap a photo of your masterpiece and share it on social media. Tag us or use the hashtag #CreativityRecipesHeartCake so we can admire your work.
Have your own twist on the design or a unique flavor idea? Drop a comment below and let us know! We’re always inspired by your creativity and love hearing about your baking adventures.
Final Note
Baking a heart-shaped cake is a labor of love, but the joy it brings is well worth the effort. Whether it’s your first attempt or you’re a seasoned baker, this cake is bound to be a showstopper. So gather your ingredients, preheat your oven, and get ready to create something truly special. Happy baking! ❤️
1 thought on “How to Make the Perfect Heart-Shaped Cake for Any Occasion”